DevMatch code problems offer the candidate a problem statement, and a starting code base. Typically, candidates follow the instructions on the statement and have to work on an existing code base to fix bugs or implement missing features.
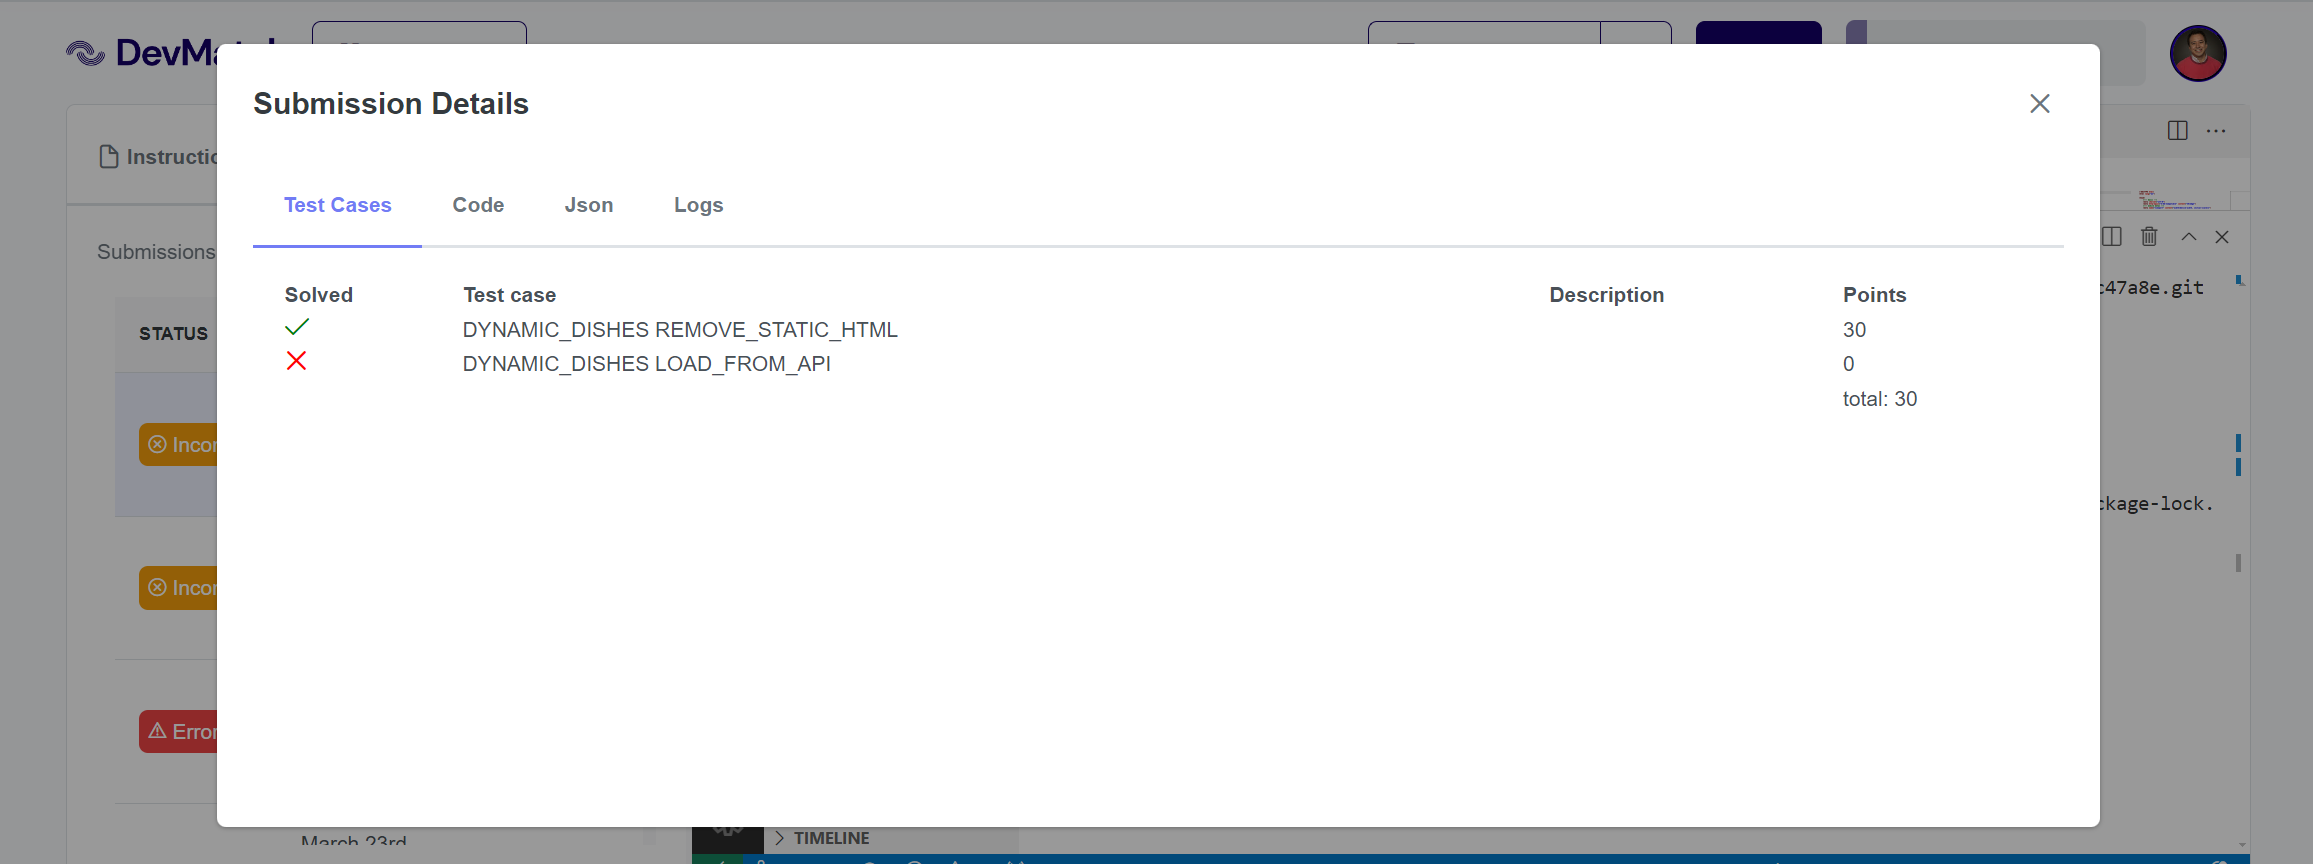
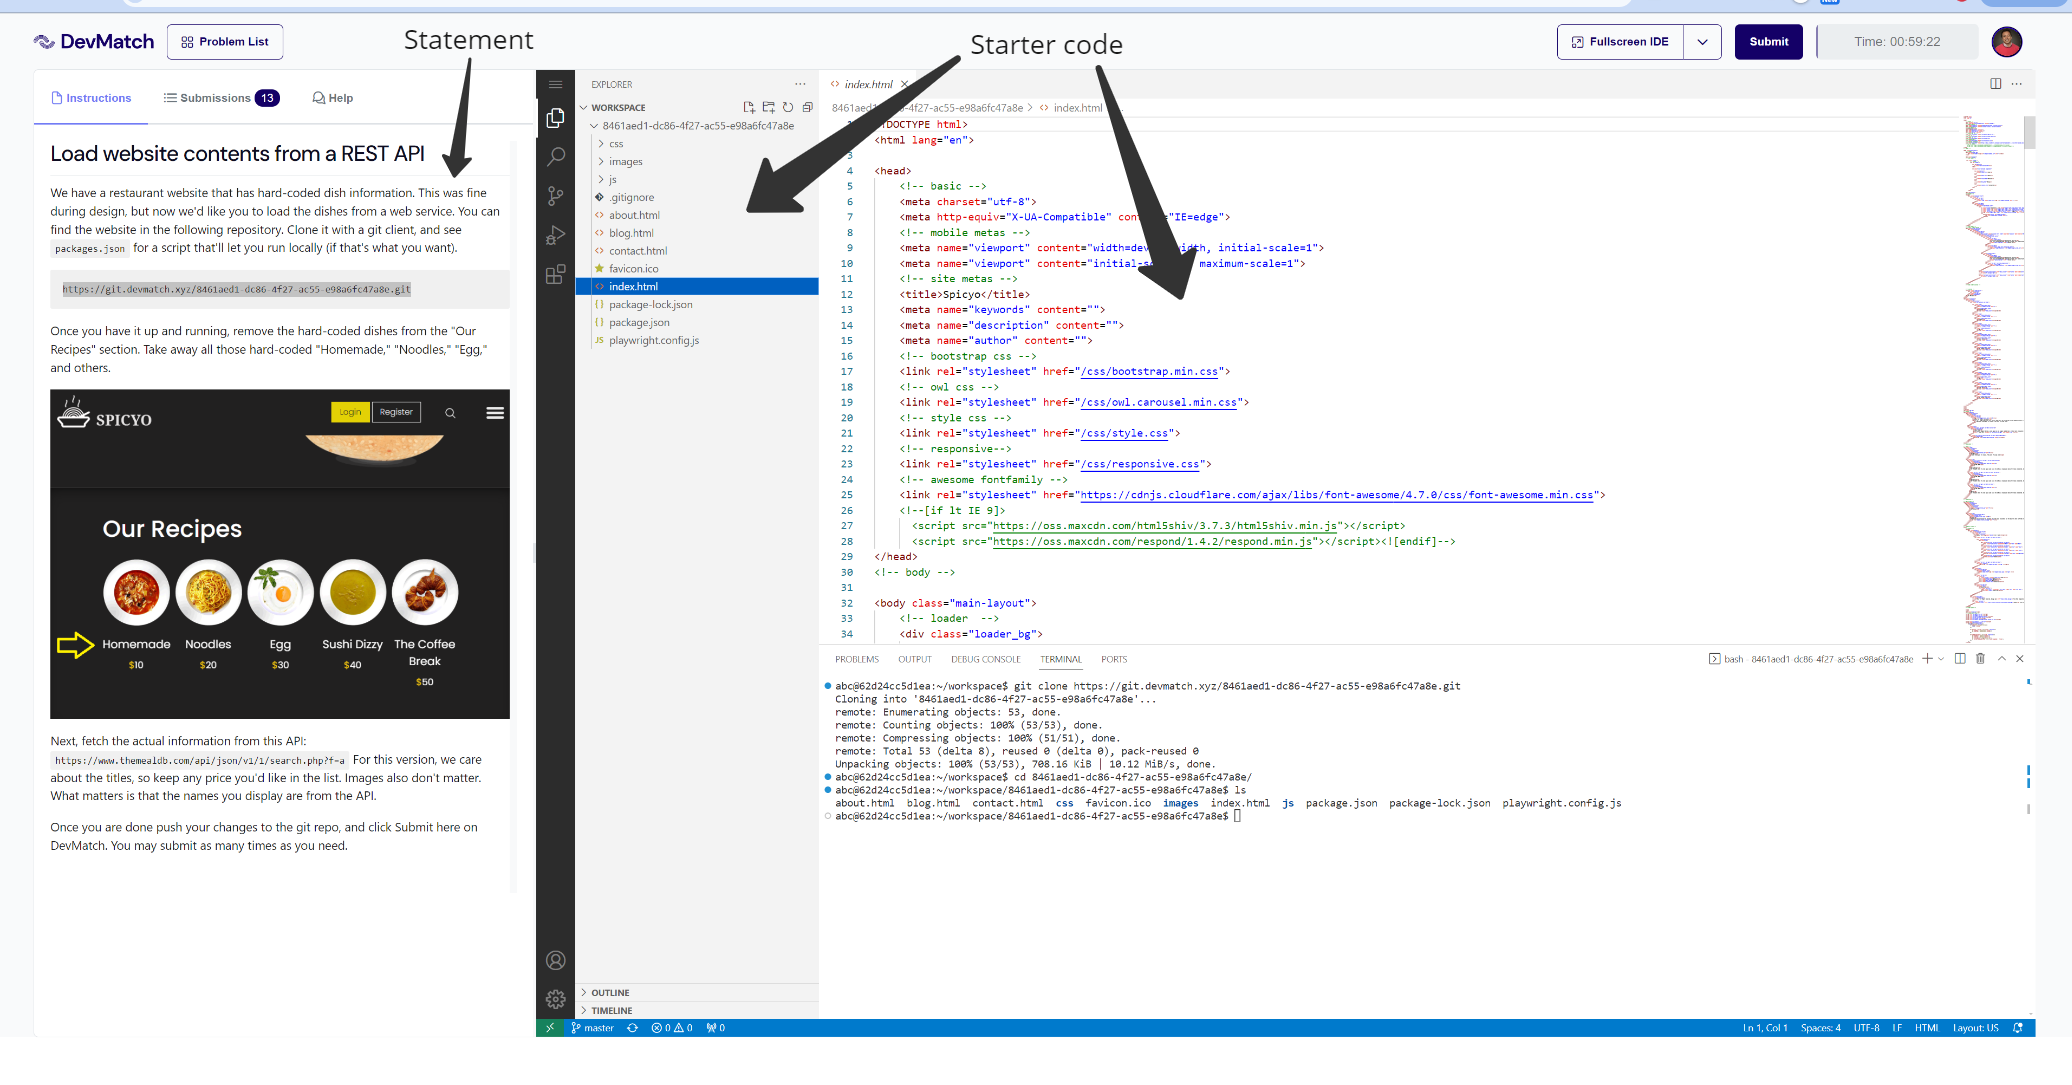 Candidates clone the code, and make changes. Once they are satisfied, they submit a new solution. Candidates can see the results in the submissions tab.
Creating a problem step by step
We will create a very simple DevMatch code problem. This problem will ask the candidate to fix a bug in a very simple JavaScript code base.
Pre-requisites
- NodeJS
- Git
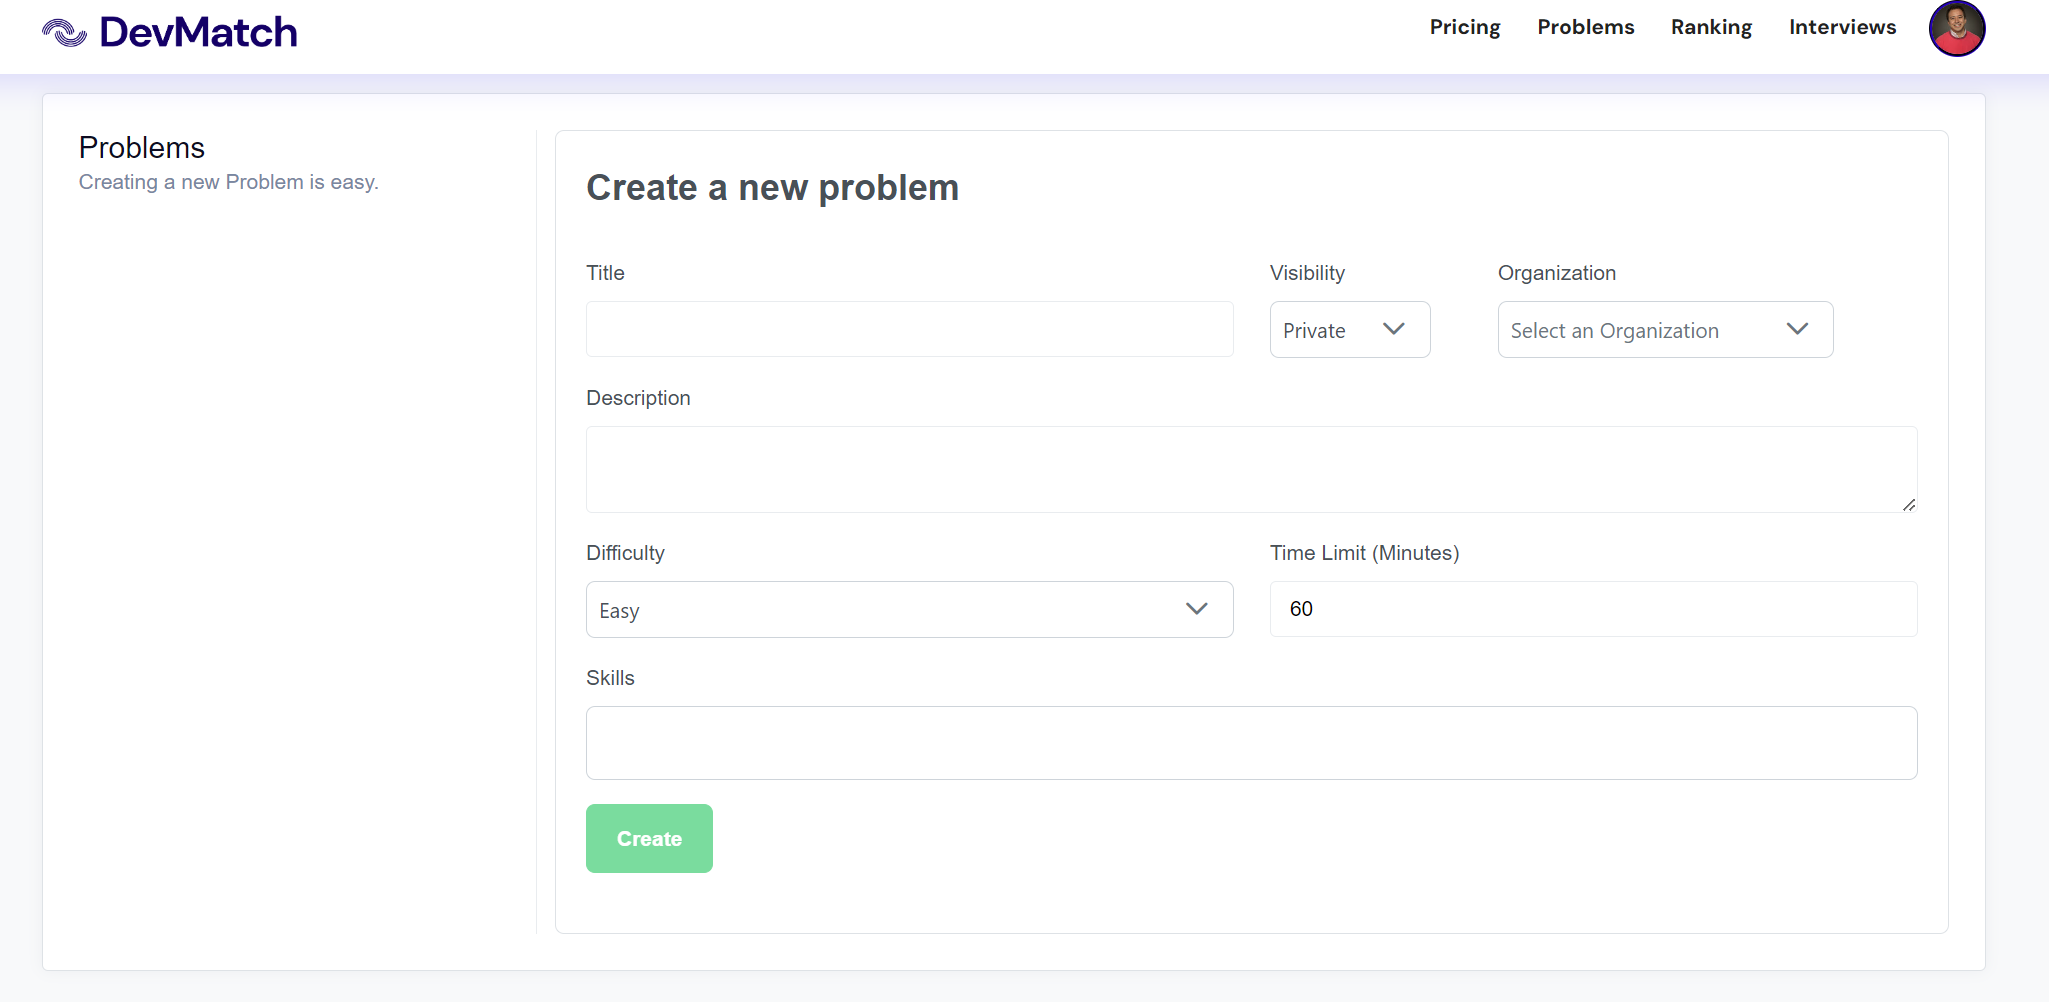
Create a new problem in DevMatch.io
Go to the new problem page, and enter the problem details:
Once you do this, you will have access to the problem edit dashboard:

This dashboard gives you the URL of a git repository. This repository contains the problem settings, definition, starter code and validation code.
Obtain the code and run it locally
Start by cloning this git repository locally:
git clone https://git.devmatch.xyz/{guid}.git
The most important aspects of this structure are:
- The
worspacedirectory. Anything in theworkspacedirectory will be presented to a user solving the problem. Here you can store the problem "starter code". Users will not see anything outside ofworkspace. - The
challenge.yamlfile. The configuration filechallenge.yamldefines the type, test cases and other problem essentials. Here is a sample Yaml configuration.
The statement
The first thing that we will change about this problem is the statement. Open challenge.yaml and edit the statement entry in this yaml file. Change the contents to be this:
statement: |
  In this challenge, you need to fix a very simple JavaScript CLI tool.

  In this repository, `{repoUrl}` you will find a very simple CLI tool, that should
  print out "Hello world", but it does not. Please figure out what's wrong.
Notice the {repoUrl} in the statement, because this is a GitProblem, the user will get a new git repo once they open a problem. This git repo will contain the starter code. We will discuss more about this later.
The starter codebase
Inside the workspace folder, you provide the starter code to the candidate. In this case, let's create a very simple JavaScript file:
console.log("Hello");
As you can see, we intentionally added a bug. The requirement is that this tool prints out "Hello world", but right not it only prints "Hello". This is what the candidate will fix.
In order to run this code, you'd do node index.js.
Test cases
Running a test command on the workspace should emit a JUnit compatible XML result file. The name of the test cases need to match the test case id. Don't change anything here for now.
If this were the output from your test:
Your test cases would need to look like this. Notice the id of the DevMatch test case matches the name of the Junit test case.
testcases:
    - id: TEST_1
      description: Add two integers
      maxPoints: 10
    - id: TEST_2
      description: Bad arguments - Too few
      maxPoints: 10
    - id: TEST_3
      description: Bad arguments - Too many
      maxPoints: 80
Workspace
Drop the folder structure that you want the user to work on.
Test locally
Navigate to the validator folder and run this problem as is. This challenge can be built and tested locally. To build the challenge, first go to the validator, install dependencies and then you can run the DevMatch CLI commands.
cd validator
npm i
npm run devmatch -- validate
Running the last validate command will run the same set of steps that DevMatch will take when validating a solution on the cloud.
Publish
Now that you have made modifications to this challenge locally, built it a final time with npm run devmatch -- validate to make sure it builds and then commit and push your changes to the same branch. Now go to DevMatch and publish the version. After publishing is completed (takes about 30 seconds) go to the preview tab to view the statement. You can now open the problem and send submissions.